How to Connect Solar Panels to an Inverter and Batteries
In this article I will show you how to connect solar panel to inverter. If you have solar panels and you want to build a photovoltaic solar system to generate your own electricity, you have to know How to Connect Solar Panels to an Inverter and Batteries. The connection must be well made so that the system works correctly and generates the desired electricity for your home
Solar energy hHow to Connect Solar Panels to an Inverter and Batteries
as been gaining popularity in recent years as an environmentally-friendly and cost-effective alternative to traditional energy sources. One of the key components of a solar energy system is the battery and inverter. In this article, we will explore the benefits of connecting your solar panel to a battery and inverter, and how to optimize your solar energy system for maximum efficiency.
Relacionado: Can I connect solar panel and inverter to the same battery?
Why connect your solar panel to a battery and inverter?
Connecting your solar panel to a battery and inverter can provide several benefits. First and foremost, it allows you to store excess energy generated by your solar panel during the day, and use it during periods of low sunlight or at night. This can significantly reduce your reliance on traditional energy sources and lower your electricity bills.
Secondly, connecting your solar panel to a battery and inverter can provide backup power in the event of a power outage. This can be particularly useful for households and businesses that rely heavily on electricity, as it ensures that essential appliances and equipment remain operational even during an outage.
Finally, connecting your solar panel to a battery and inverter can help to reduce your carbon footprint by reducing your reliance on fossil fuels. Solar energy is a renewable and sustainable energy source, and by harnessing it, you can help to reduce greenhouse gas emissions and combat climate change.
How to optimize your solar energy system for maximum efficiency
Optimizing your solar energy system involves several key factors, including the size and type of battery and inverter, the capacity of your solar panel, and the location and orientation of your solar panel. Here are some tips for optimizing your solar energy system for maximum efficiency:
- Choose the right size and type of battery and inverter: The size and type of battery and inverter you choose will depend on your energy needs and budget. It is important to choose a battery and inverter that can store and convert enough energy to meet your daily energy requirements.
- Consider the capacity of your solar panel: The capacity of your solar panel will also affect the efficiency of your solar energy system. Make sure to choose a solar panel with a capacity that is appropriate for your energy needs.
- Location and orientation of your solar panel: The location and orientation of your solar panel can also affect its efficiency. Make sure to install your solar panel in a location that receives plenty of sunlight throughout the day, and orient it in a direction that maximizes exposure to the sun.
- Regular maintenance: Regular maintenance of your solar panel, battery, and inverter is important to ensure maximum efficiency and longevity. This includes cleaning the solar panel regularly, checking the battery and inverter for signs of wear and tear, and replacing any damaged components as needed.
In conclusion, connecting your solar panel to a battery and inverter can provide significant benefits, including reduced reliance on traditional energy sources, backup power during outages, and a reduced carbon footprint. By optimizing your solar energy system for maximum efficiency, you can enjoy these benefits while also saving money on your electricity bills and contributing to a more sustainable future.
Related:
- How to connect solar panels to inverter
- how to connect a solar panel to a battery and inverter
- How to connect my solar panels
- How to charge a battery with a solar panel
- MATCHING SOLAR PANELS WITH BATTERIES: HOW TO DO IT?
- How to install an inverter?
- How to connect a power inverter to a solar panel?
[orbital_cluster tags=”15″ order=”DESC”]
How to connect a solar panel to a battery and inverter
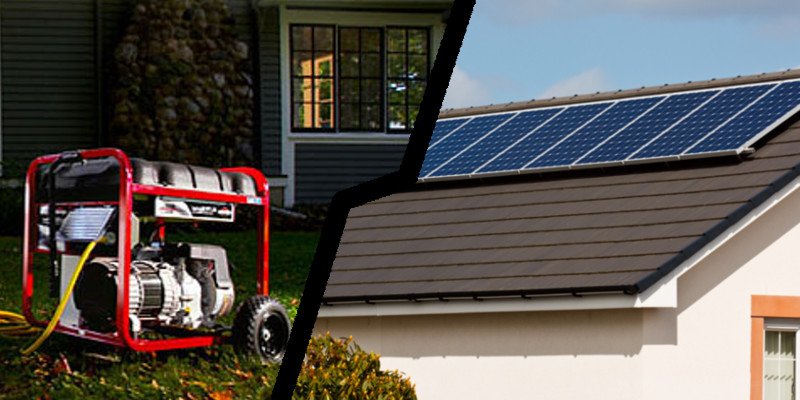
Honestly, solar panels and inverters for home use have become a necessity rather than a luxury with frequent power outages. People now want to operate all household appliances, including air conditioners, televisions, and refrigerators for their convenience.
The solar panels and investors have played a key role for those who want a power supply 24 hours of the day and, at some point, even have been called as the ” alternative energy source of the 21st century ” This Day Live. Due to its quiet and pollution-free ability, an inverter is something that every home should have.
Step 1: Connect the solar panels to the inverter.
Step 2: Connect the batteries to the inverter.
Step 3: Connect the inverter to the batteries.
Step 4: Connect the inverter to the solar panels.
Step 5: Connect the batteries to the solar panels.
How to install solar panels and inverter: Guide
Installing solar panels and an inverter can be a complex process that typically requires professional expertise to ensure proper installation and safety. However, I can provide you with a general overview of the steps involved. Keep in mind that local regulations, specific equipment, and other factors may vary, so it’s crucial to consult with a qualified solar installer or electrician before attempting any installation. Here’s a simplified guide:
- Assess your energy needs: Determine your energy requirements and evaluate if solar panels are a suitable solution for your home or property. Consider factors such as available roof space, shading, and local weather conditions.
- Obtain necessary permits and approvals: Check with your local authorities or homeowner’s association to obtain any necessary permits and ensure compliance with regulations.
- Design the system: Work with a solar professional to design a solar system that meets your energy needs. This includes determining the number and type of solar panels, as well as the size and capacity of the inverter.
- Gather the equipment and materials: Purchase the solar panels, inverter, mounting hardware, wiring, and other necessary components based on the design of your solar system. Ensure that you have all the required tools for installation.
- Prepare the installation site: Clear the area where the solar panels will be installed. If needed, reinforce the roof structure to support the added weight.
- Install the solar panels: Mount the solar panels on the roof or in a suitable location based on the design. Follow the manufacturer’s instructions and guidelines for proper installation. Ensure that the panels are securely attached and correctly oriented for optimal sunlight exposure.
- Install the inverter: Position the inverter in a well-ventilated area near the main electrical panel. Connect it to the solar panels using appropriate wiring and conduit. Follow the manufacturer’s instructions carefully during the installation process.
- Connect the electrical components: Connect the solar panels to the inverter, and then connect the inverter to the main electrical panel of your property. This step involves working with electrical wiring, which should be done by a qualified electrician to ensure safety and code compliance.
- Test the system: Once the installation is complete, conduct a thorough test to ensure that the solar panels and inverter are functioning correctly. Verify the production of electricity and monitor the system’s performance.
- Finalize the installation: Arrange for a final inspection by the relevant authorities to ensure compliance with local regulations. Complete any necessary paperwork and documentation required for grid connection, net metering, or other incentives.
Remember, it’s highly recommended to hire a professional solar installer or electrician with experience in solar panel installations. They can provide expert guidance, ensure proper installation, and handle any specific challenges that may arise during the process.
How to install solar panels and inverters yourself
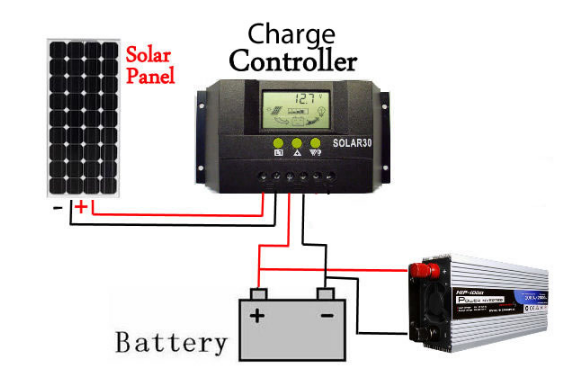
First, connect the positive lead of the solar panel to the positive terminal of the inverter. Then, connect the negative lead of the solar panel to the negative terminal of the inverter.
We have categorized the installation process into four different steps:
-
Solar panel installation:
Here you may need a level of help from a professional to allow the solar panel to be firmly nailed or bolted to your roof.
To get the maximum collection of sunlight from the sun, place it where it can have direct sunlight.
When the solar panel is exposed to direct sunlight, it should provide you with at least 26 volts if you use your multimeter or voltmeter to measure its voltage. Try to fix the panels away from shady areas, this affects the efficiency of the solar panels.
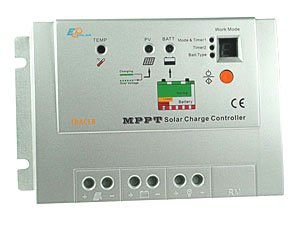
2. Connecting your charge controller:
The current we get from the solar panels will not stay constant throughout the day, therefore you should not connect photovoltaic solar modules directly to charge your battery as it will damage it over time.
So you need a device called a Solar Charge Controller to control the current we receive from solar panels. The charge controller has a built-in PWM (Pulse Width Modulation) charger to charge the lead-acid battery in three stages, ensuring long battery life.
The charge controller has three connection points for solar panels, battery, and direct current (DC). If you look at the back of the solar panel (the one we assembled in the first step) , you will see two wires, which are positive (+) and negative (-). Connect them where the solar panel indicated on the charge controller , connect positive to positive, negative to negative.
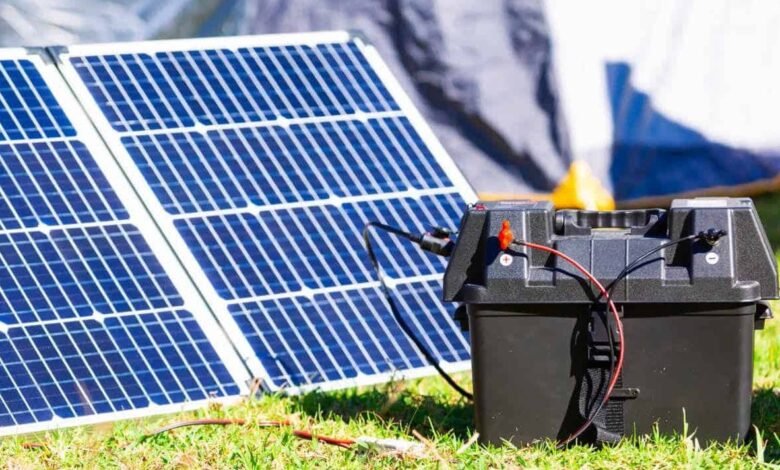
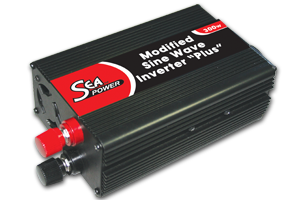
3. Connect the battery to the inverter:
On the back of your inverter you will see where the 12V DC input is indicated, connect the positive (+) terminal of the battery to the positive (+) terminal of the inverter and the negative (-) terminal of the battery to the negative ( -) inverter terminal.
Please, the inverter must stay off on the point.
4. Connecting the battery to charge the controller:
As indicated in the third step (above), the charge controller has positive (+) and negative (-) terminals for the battery. Connect the positive (+) of the charge controller to the positive for the battery and the negative (-) of the charge controller to the negative of the battery
5. Giving energy to your home:
CAUTION:
Have an electrician separate the load intended for the inverter, so that the inverter is not damaged or damaged when the house is powered.
me. Power the inverter, use your voltmeter to check the inverter output voltage, which should be 230V.
1- Turn the inverter OFF .
2- Turn OFF all your devices
3- Connect the inverter output to your home’s electrical grid.
4- Turn ON your inverter.
5- Power your appliances, starting with the one that consumes the least voltage.
How to connect solar panels to inverter
Connecting solar panels to an inverter involves a few simple steps:
- Determine the voltage and current rating of your solar panels. This information can usually be found in the documentation that came with the panels or on the manufacturer’s website.
- Choose an inverter that is compatible with the voltage and current rating of your solar panels. The inverter should also have a rating that matches or exceeds the maximum output of your solar panels.
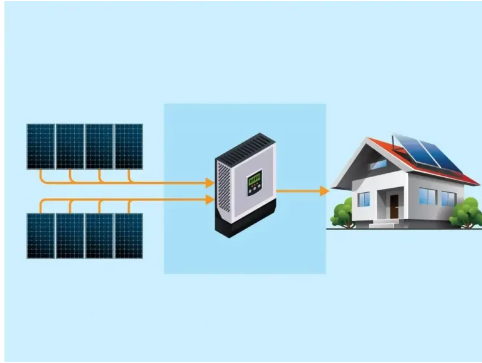
- Connect the solar panels to a combiner box, which is a junction box that combines the outputs of multiple solar panels into a single cable. Make sure that the positive and negative wires from each panel are connected correctly.
- Connect the cable from the combiner box to the DC input terminals on the inverter. Again, make sure that the positive and negative wires are connected correctly.
- Connect the AC output terminals of the inverter to a circuit breaker or disconnect switch, which should then be connected to your home’s electrical system.
- Turn on the inverter and monitor the system to ensure that it is working correctly. You may need to consult the inverter’s manual for information on how to monitor its performance.
It’s important to note that solar panels and inverters generate high voltages and currents, so it’s important to follow all safety precautions and consult with a licensed electrician or solar installer if you’re unsure about any aspect of the installation process.